
SSL Installation Instructions (single name certificate)
The following instructions will guide you through the SSL installation process on Microsoft IIS 8 using a SSL certificate that only secures one domain name. If you have more than one server or device, you will need to install the certificate on each server or device you need to secure. If you still have not generated your certificate and completed the validation process, reference our CSR Generation Instructions and disregard the steps below.
- Make sure you have all the following files saved before proceeding:
- Your Server Certificate - This is the certificate you received from the CA for your domain. You may have been sent this via email. If not, you can download it by visiting your Account Dashboard and clicking on your order.
- Intermediate Certificates - These files allow the devices connecting to your server to identify the issuing CA. There may be more than one of these certificates. If you got your certificate in a ZIP folder, it should also contain the Intermediate certificate(s), which is sometimes referred to as a CA Bundle. If not, download the appropriate CA Bundle for your certificate.
- Your Private Key - This file should be on your server, or in your possession if you generated your CSR from a free generator tool. On certain platforms, such as Microsoft IIS, the private key is not immediately visible to you but the server is keeping track of it.
- Click Start, Control Panel, System and Security, Administrative Tools, and then select Internet Information Services (IIS) Manager.
- In the left Connections menu, select the server name (host) where you want to install the SSL certificate.

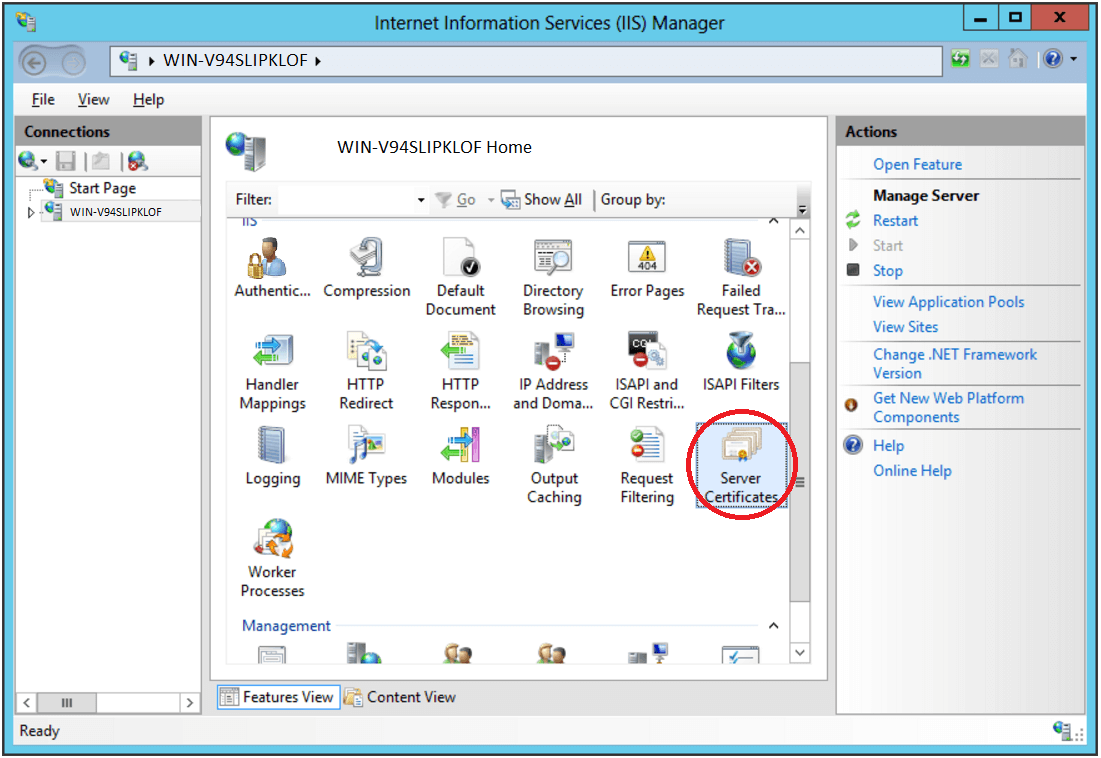
- In the center menu, click the Server Certificates icon under the Security section near the bottom.
- In the right Actions menu, click Complete Certificate Request...

- In the Complete Certificate Request wizard, click " ..." to browse and select Your Server Certificate file that was previously saved on your server's desktop.
- Enter a Friendly Name, which is an internal reference name to distinguish the file later. We recommend including the CAs name and expiration date.
- Select Personal as your certificate store for the new certificate.

- Click OK and the newly installed certificate should appear in the refreshed Server Certificate List.
- Now, proceed with the remaining steps which will help you assign or bind the SSL certificate to the appropriate website.
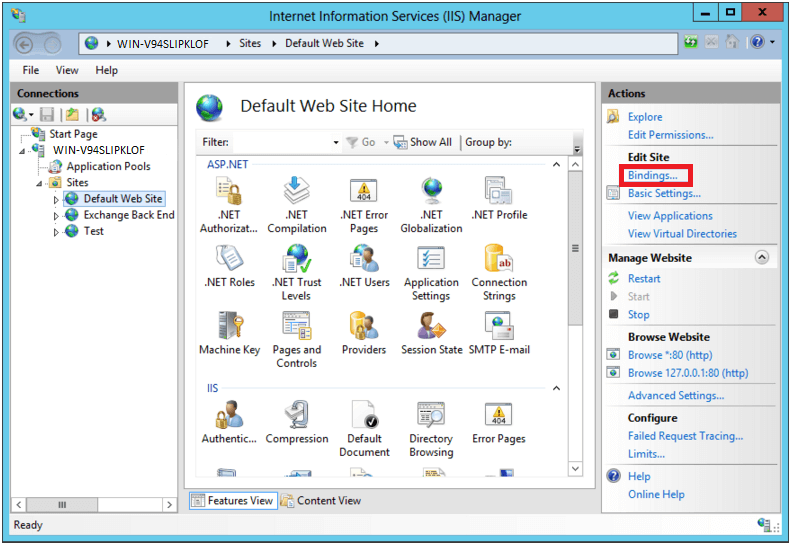
- From the left Connections menu, expand your server's name, expand the Sites folder, and then select the site (e.g. Default Web Site) that you want to secure.
- In the right Actions menu, click Bindings...
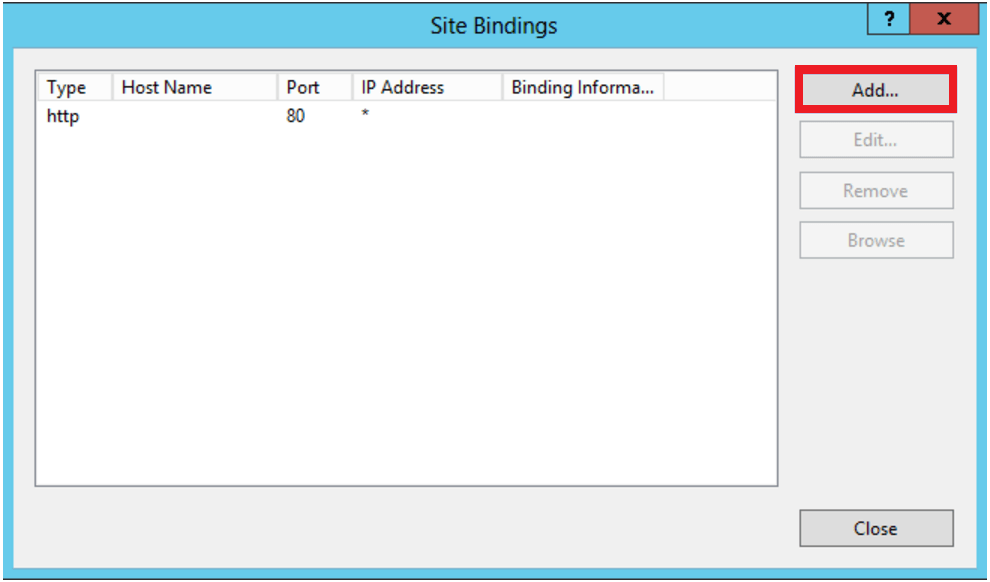
- In Site Bindings..., click Add.

Note: If you already have the appropriate site binding created, click "Edit" and change the SSL certificate accordingly.
- In Add Site Binding, enter the following information:
- Type - Select "https."
- IP Address - Select "All unassigned." Now, if you have multiple IP address, select the correct one that applies.
- Port - Enter "443" unless you are listening to SSL traffic on another port (e.g. 992).
- SSL Certificates - Select the "friendly name" of the SSL certificate you just installed. You can always click "View" to confirm the certificates validity details.

- Click Ok to finish binding the SSL certificate to your live website.
Congratulations! You've successfully installed your SSL certificate! To check your work, visit the website in your browser at https://yourdomain.tld and view the certificate/site information to see if HTTPS/SSL is working properly. Remember, you may need to restart your server for changes to take effect.
To check your server's configurations more thoroughly, use our SSL Checker Tool or contact our Customer Experience Department for additional assistance.
SSL Installation Instructions (multiple certificates using SNI)
The following instructions will guide you through the SSL installation process on Microsoft IIS 8 with multiple SSL certificate securing one or more domain names using Server Name Indication (SNI). If you have more than one server or device, you will need to install the certificate on each server or device you need to secure. If you still have not generated your certificate and completed the validation process, reference our CSR Generation Instructions and disregard the steps below.
- Make sure you have all the following files saved before proceeding:
- Your Server Certificate - This is the certificate you received from the CA for your domain. You may have been sent this via email. If not, you can download it by visiting your Account Dashboard and clicking on your order.
- Intermediate Certificates - These files allow the devices connecting to your server to identify the issuing CA. There may be more than one of these certificates. If you got your certificate in a ZIP folder, it should also contain the Intermediate certificate(s), which is sometimes referred to as a CA Bundle. If not, download the appropriate CA Bundle for your certificate.
- Your Private Key - This file should be on your server, or in your possession if you generated your CSR from a free generator tool. On certain platforms, such as Microsoft IIS, the private key is not immediately visible to you but the server is keeping track of it.
- Click Start, Control Panel, System and Security, Administrative Tools, and then select Internet Information Services (IIS) Manager.
- In the left Connections menu, select the server name (host) where you want to install the SSL certificate.

- In the center menu, click the Server Certificates icon under the Security section near the bottom.

- In the right Actions menu, click Complete Certificate Request...

- In the Complete Certificate Request wizard, click " ..." to browse and select Your Server Certificate file that was previously saved on your server's desktop.
- Enter a Friendly Name, which is an internal reference name to distinguish the file later. We recommend including the CAs name and expiration date.
- Select Web Hosting as your certificate store for the new certificate.

- Click Ok and the newly installed certificate should appear in the refreshed Server Certificate List.
Note: If you receive an error during this step, please reference the "Known Error Message in IIS 8" section below.
- Now, proceed with the remaining steps which will help you assign or bind the SSL certificate to the appropriate website.
- From the left Connections menu, expand your server's name, expand the Sites folder, and then select the site (e.g. Default Web Site) that you want to secure.
- In the right Actions menu, click Bindings...

- In Site Bindings..., click Add.
-
Note: If you already have the appropriate site binding created, click "Edit" and change the SSL certificate accordingly.
- In Add Site Binding, enter the following information:
- Type - Select "https."
- IP Address - Select "All unassigned." Now, if you have multiple IP address, select the correct one that applies.
- Port - Enter "443" unless you are listening to SSL traffic on another port (e.g. 992).
-
SSL Certificates - Select the "friendly name" of the SSL certificate you just installed. You can always click "View" to confirm the certificates validity details.

- Click OK to finish binding the first SSL certificate to your live website.
- Now, repeat the process to make another Certificate Signing Request in Microsoft IIS 8 for the 2nd website.
- Install the new SSL certificate referencing the above instructions, up through step 13.
- In Add Site Bindings, enter the following information:
- Type - Select "https."
- IP Address - Select "All unassigned." Now, if you have multiple IP addresses, select the correct one that applies.
- Port - Enter "443" unless you are listening to SSL traffic on another port (e.g. 992).
- Host Name - Enter the "host name" or 'domain name' that you are securing and check the box for Require Server Name Indication. This box will be required for all additional sites that you secure on this server (other than the primary host name specified in step 14).
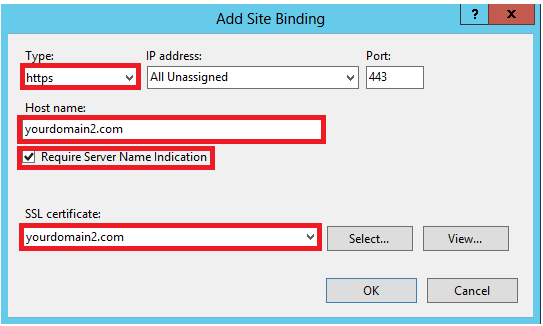
- Click OK to finish binding the 2nd SSL certificate to your live website.
- Repeat steps 16 through 19 to secure any additional host names using SNI.
Congratulations! You've successfully installed your SSL certificate(s)! To check your work, visit the website in your browser at https://yourdomain.tld and view the certificate/site information to see if HTTPS/SSL is working properly. Remember, you may need to restart your server for changes to take effect.
To check your server's configurations more thoroughly, use our SSL Checker Tool or contact our Customer Experience Department for additional assistance.
Known Error Messages in IIS 8
Microsoft IIS 8 is known to generate error message: "Failed to remove the certificate."
Here's our solution:
If you are certain this is the same server where you generated the CSR, then the error may be meaningless and the certificate may have correctly installed. To test this, close the dialog and click "F5" to refresh the list of server certificates. The new certificate should now be in the list, and you can continue with your next step.
However, if the newly installed certificate does not appear in the server certificate list, we recommend you re-issue the certificate with a new CSR and attempt the installation process again. Here are some instructions to guide you through the reissuance process:
- Generate a new Certificate Signing Request (CSR) in Microsoft IIS 8.
- Log in to your Account Control Panel.
- Select your Active Certificate.
- Click the Re-Issue Certificate button.
- Paste in your new CSR.
- Submit and complete domain validation again (if required).
- Save the newly issued SSL certificate on your server's desktop.
- Repeat the SSL installation process referencing the above instructions.